For this tutorial you will need a graphic.
No outside filters are used.
Hint for choosing your own graphic to work this tutorial, look for one that has something to add motion to: water, fire, smoke are examples. You also need something to make sparkle/glitter: stars, the moon, flowers. That should get you thinking!!
Hint 2, if your image is large, your animation will be a large file size. The best time to size it down is before you start. Image-Resize, pixels for the Dimension, 400 for the longest side, Resample using Smart Size, and Resize all layers checked.
Open your choosen image, Shift-D to duplicate it, then close the original.
Choose a light color from the image for the Foreground color, and a dark color for the Background.
Image-Add Borders, 5 px symetrical, your light color.
With your Magic Wand and these settings:
Click in a place you want to glitter, in the example above, I clicked in one of the stars on the little ship. In the example at the bottom of this, I clicked in the candle flame.
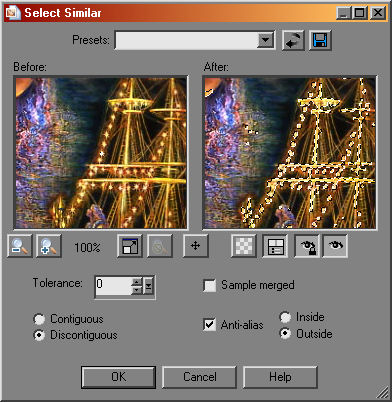
Selecions-Modify-Select Similar with these settings.
For the example below, I had to adjust the Tolerance to 18 in order to "get" most of the candle flame.
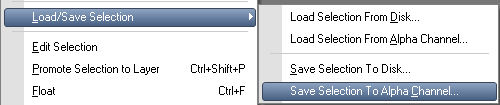
Selections-Load/Save Selection, Save Selection to Alpha Channel.
In the window that pops up, change nothing, just click on Save.
Let me explain just a bit about this wonderful tool in PSP :-)
When you save a selection to the Alpha Channel, it is only there for the image you are working on.
You can save any selection you wish to use again in that image, a frame border, a selection inside a transparant area before filling.
In this case, I wanted to choose the selection now and save it, before we go on to the next part, because the Similar-Selection would grab places I didn't want it to :-)
Now that you have the selection saved to the Alpha Channel, Selections-None.
Now we're going to select the water to set in motion.
With your Lasso tool, you can find that in the Magic Wand flyout, with these settings.
Click at a starting point in the water, and then click around the edges, each click drops an anchor and you can change direction.
Don't worry about getting it exact, but don't get too close to the edge of the water, or too close to the edge of the image, what we're going to do will expand this selection a bit.
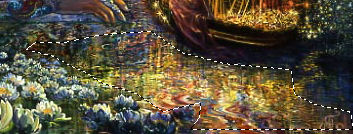
When you are back at your starting point, double click and you'll have your selection.
You want something about like this.
Keep Selected.
Layers-Duplicate.
Repeat, Layers-Duplicate.
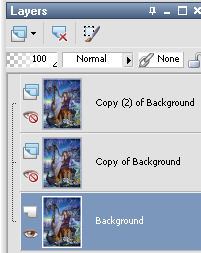
Different versions of PSP's Layer Palette may look a bit different, but these steps will be about the same for all.
You now have 3 identical layers in the layer palette, your ants still marching around the water selection.
Close the eye on the top 2 layers and highlight the bottom layer.
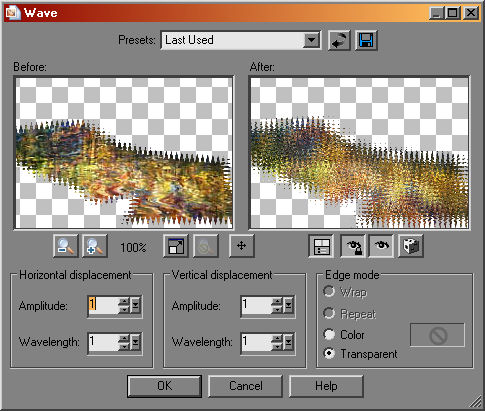
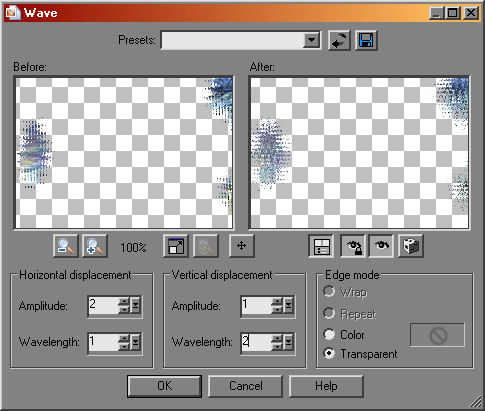
Effects-Distortion Effects-Wave, with these settings.
If you now have Floating Selection layer in the layer palette, Selections-Defloat. Keep selected!!
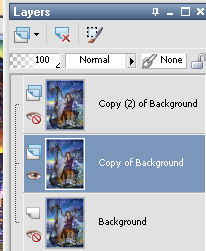
Close the eye on the bottom layer, open the eye on the middle layer and highlight it.
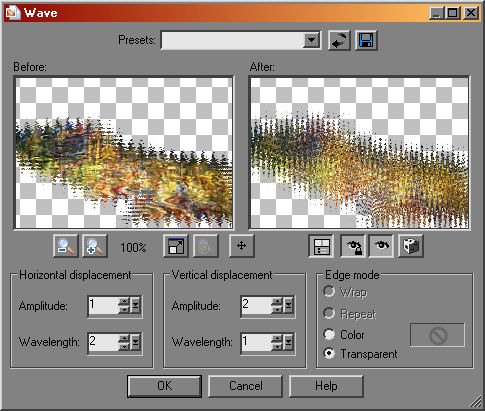
Effects-Distortion Effects-Wave with these settings.
Again, if you have the floating selection in your layer palette, Selections-Defloat, keep selected!!
Close the eye on the bottom 2 layers and highlight the top layer.
Effects-Distortion Effects-Wave with these settings.
One more time, Selections-Defloat if you have a floating layer in your layer palette.
Selections-None.
Now you have three layers with the water moving.
We're going to work on the glitter now :-)
In your layer palette, close the eye on the top 2 layers and highlight the bottom.
Selections-Load/Save Selection-Load Selection from Alpha Channel, and then Load at the next window.
Now you should have the ants around what you want to glitter :-)
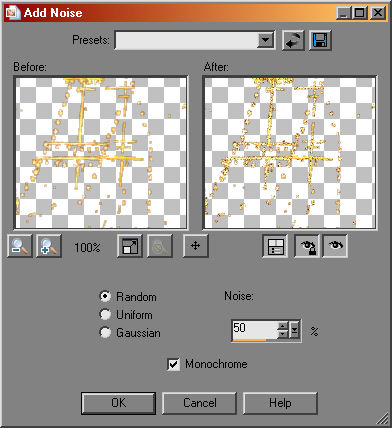
Adjust-Add/Remove Noise-Add Noise with these settings.
Close the eye on layer 1, open layer 2 and highlight it, Adjust-Add/Remove Noise, Add noise, check Uniform.
Close the eye on layer 2, open layer 3 and highlight it. Adjust-Add/Remove Noise, Add noise, check Gaussian.
Selections-None.
This step is optional, to repeat the noise on the outer frame.
If you wish to do this, with your magic wand on previous settings, choose the outer frame.
Repeat the steps for the noise on each layer.
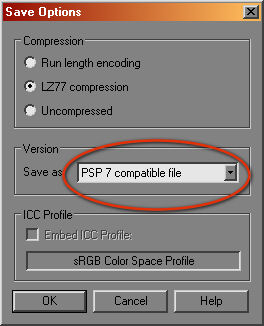
File-Save As, give it a name you can remember, as a .psp file, and before you hit save, make sure to save it as a PSP7 compatible file by choosing Options first and choosing that from the drop-down menu as below.
Animation Shop has not been upgraded since then.....LOL
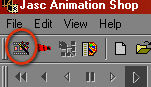
Open Animation Shop.
Click on the little Wizard icon just under File.
Tick Same size as the first image frame.
Tick Opaque with black as the color in the next window.
Tick Upper left and With the canvas color in the next window.
Tick Yes, repeat the animation, and 25 as How Long in the next window.
In the next window, click on Add Image and locate the file you saved.
Then click Next, and Finish in the last window.
Your animation is created!
View-Animation and you will see how it looks.
File-Save As, name it and Save.
You're done !!
I hope you enjoyed it :-)