For this tutorial you will need a tube.
Unzip DC Special to your plugins folder before opening PSP.
Open your chosen tube in PSP. Shift+D to duplicate, then close the original.
Pick a light color from your graphic for the Foreground, and a darker color for your Background.
Layers-Duplicate.
Highlight the bottom layer in the layer palatte.
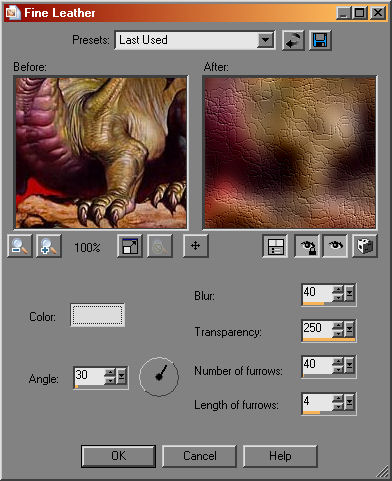
Effects-Texture-Fine Leather with these settings.
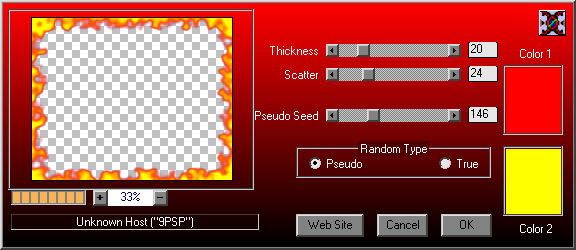
Effects-DC Special-Rain with these settings.
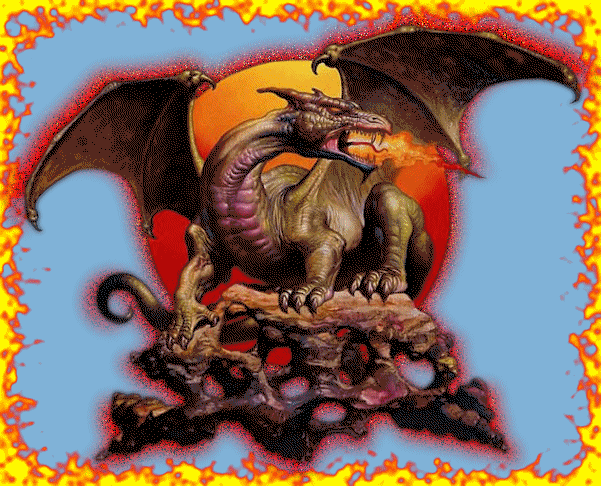
The examples you are seeing made the tag at the bottom of the page here.
All the steps were the same for the tag at the top except two and I will cover them when we get there :-)
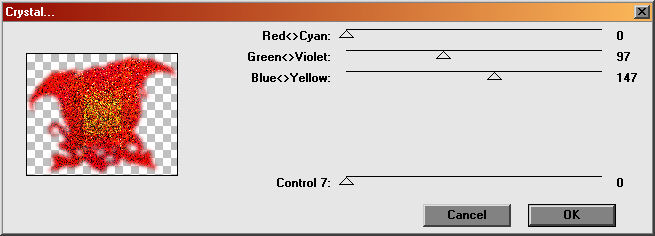
Effects-DC Special-Crystal.
I used these settings for the Dragon Moon, changed the colors for the Fairy Moon.
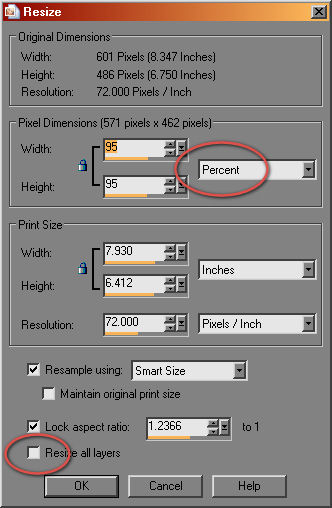
In your Layer palette, Highlight the top tube layer.
Image-Resize.
Be sure the Resize all layers is Not checked!
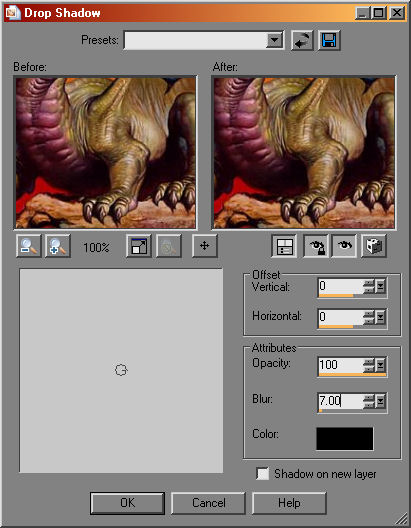
Effects-3d-Drop Shadow with these settings.
First change in the Dragon Moon and Fairy Moon tags......
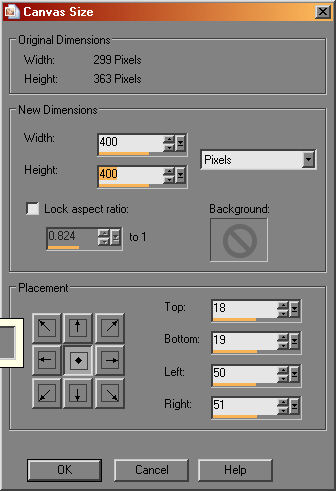
The canvas size for the Dragon Moon was big enough, but not for the Fairy Moon.
For the Fairy Moon, Image-Canvas Size with these settings.
With your top layer still highlighted, add your text.
I gave my text a "glowing" effect by giving it a Drop Shadow with V & H at 0, opacity 100, blur 5 with the color a light yellow. Repeat the Drop Shadow.
Layers-Merge-Merge Visible.
Add a New Raster Layer, Transparent.
Floodfill it with a contrasting color from your tube and drag it to the bottom.
Add a New Raster Layer, Transparent.
You should now have 3 layers in your layer palette, top the tube, middle empty and bottom the background color.
Highlight the middle layer.
Second change between the Dragon Moon and Fairy Moon....
In the Dragon Moon the flames go all the way to the edges, in the Fairy Moon I wanted a bit of frame.
Selections-Select All.
Selections-Modify-Contract by 5.
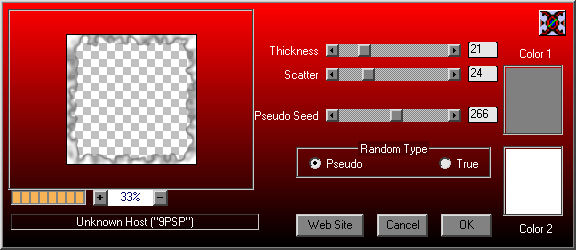
Effects-DC Special-Fire with these settings for fire.
Or change the colors for fog/smoke.
Layers-Merge-Merge All.
Selections-None.
Edit-Copy.
Edit-Paste as a New Image.
OK, now you have 2 identical copies of the same thing, 1 layer each.
The original which I will now call the Working copy.
And the second which will be the base for the animation which I will call New Image.
Back on your Working copy, Edit-Undo 3 times, that should bring you back to the blank "fire" layer.
Effects-DC Special-Fire and change the Pseudo seed.
Layers-Merge-Merge All.
Selections-None.
Edit-Copy.
Activate your New Image and Paste as a New Layer.
Once more, back to your Working copy, Edit-Undo 3 times.
A last time, Effects-DC Special-Fire and change the Pseudo seed again.
Layers-Merge-Merge All.
Selections-None.
Edit-Copy.
Activate your New Image and Paste as a New Layer.
Now your New Image should have 3 layers.
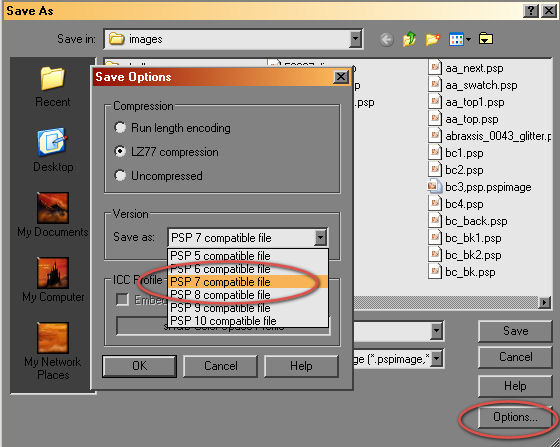
File-Save As and save as a .psp file where you can find it.
Be sure when you save it that it is PSP7 compatible because Animation Shop has not been upgraded since then.
Open Animation Shop.
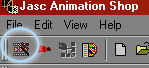
Click on the Wizard icon just under File in AS.
Click on Same Size and OK.
Tick Opaque with Black as the color and Next.
Tick Upper left, and then With the canvas and Next.
Tick Yes, repeat the animation, set the frame speed to 20, and Next.
Click on Add Image and locate the .psp file you saved, highlight it and then click on Next.
Click on Finish in the next window and you will then see your psp file.
View-Animation and you will see the action.
File-Save As. Give your animation a name, and save as a gif.
You will probably see some other windows pop up asking you the quality of the gif......I can't show you those because at some point there is a box that asks "always use these settings" and I ticked it.....do NOT check that box!!
There seems to be no way to reverse that. I need to uninstall and re-install Animation Shop......when I find the time...... :-)
One thing I can tell you is the better the quality, the larger the file size.
In some cases it's not a big deal, and others it is.
You're Done!!
I hope you had fun with it :-)