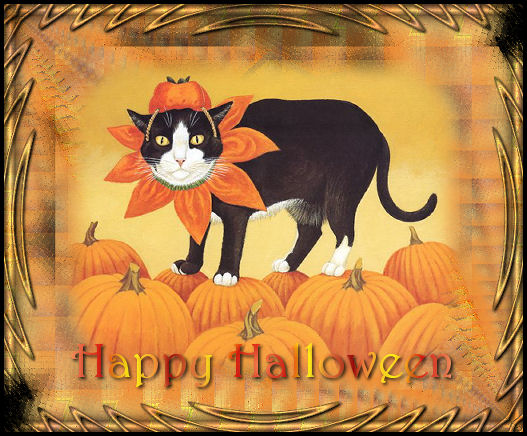
For this tutorial you will need a graphic.
No outside filters are used.
I will call this Beginners, although, there are quite a few steps!! Be sure and Save Often :-)
Open your chosen graphic in PSP. Shift+D to duplicate, then close the original.
Activate your graphic.
In both the graphics supplied, there are pre-existing frames around them.
We are going to "mist" a selection inside the main picture.
Choose your Selection tool with these settings.
I have choosen the Rounded Rectangle, but you could choose any of the other shapes, remembering that would change the overall outcome of this tut :-) Nothing wrong with that....play if you wish by all means!!! In the example at the bottom of this tut I used an ellipse selection, so you can see the difference :-)
The Feather size is the width of the "fade out", make sure you draw your selection far enough inside the graphic so you don't pick up any of the framing.
You will see the ants jump out to the feathered edge.
If you don't like where it ended up, Edit-Undo and try again :-)
If you are happy with it, Edit-Copy.
Then Edit-Paste as a New Image.
Voila! You made a Misted image!
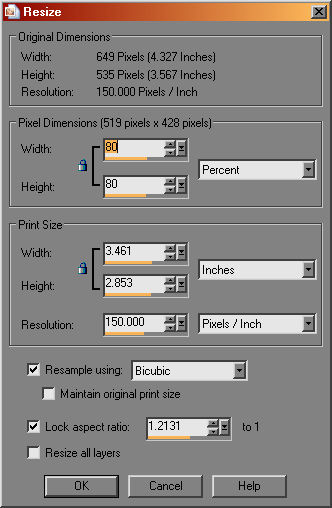
Now, let's give us some working space.
Image-Resize, with these settings.
Make sure resize all layers is Not checked.
In your layer palatte, right click on the single layer and Duplicate.
Click the Eye to close the top layer and highlight the bottom layer.
Adjust-Blur-Gaussian Blur with a Radius of 30.
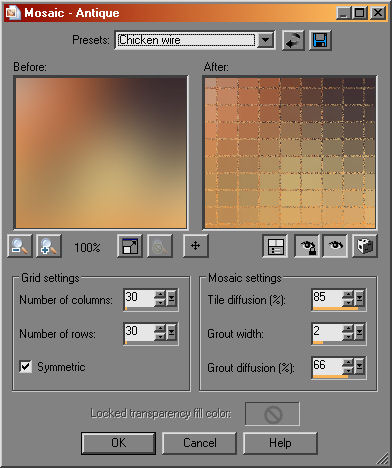
Effects-Texture Effects-Mosaic Antique with these settings.
The settings were in my Presets as Chicken Wire, I'm afraid I have no idea where I got it.....LOL
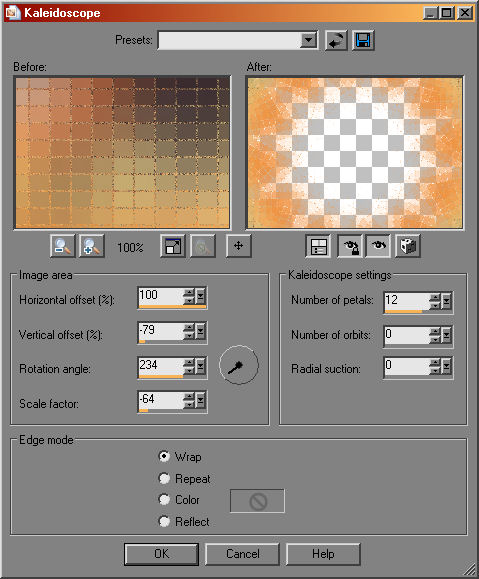
Now, Effects-Reflection Effects-Kaleidoscope with these settings.
Effects-Reflection Effects-Feedback with all settings at 100, Eliptical Not checked.
In the Layer palette, right click on this layer and Duplicate.
Image-Mirror.
Image-Flip.
Layers-New Raster layer.
In the Layer palette, right click on the empty layer and Arrange-Send to Bottom.
Floodfill this layer with a color from your image. In the top example I used black, in the one at the bottom of this tut I used a light color.
With your original misted layer still closed off, right click on the floodfilled layer and Merge-Merge Visible.
Now, open the top misted layer.
If your background is too dark for the misted image, lower the opacity of the background layer.
When you are happy with it, in the Layer palette, right click and Merge-Merge All.
Selections-Select All
Selections-Modify-Contract by 15.
Selections-Float.
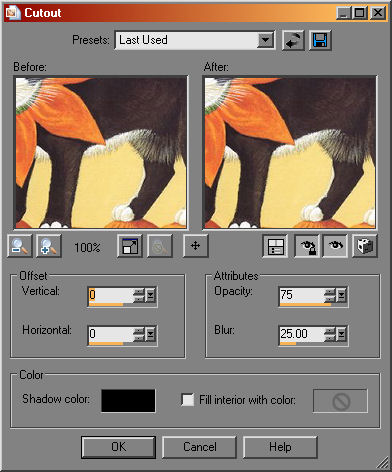
Effects-3d effects-Cutout with these settings.
Selections-Defloat.
Selections-Invert.
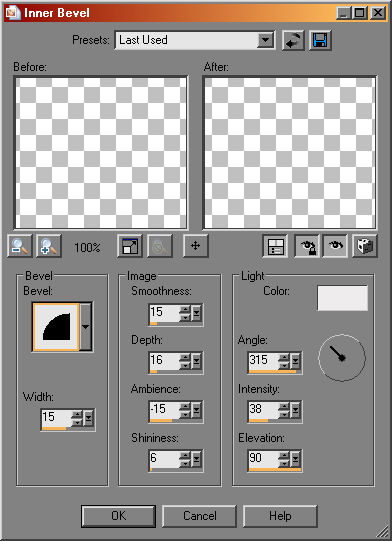
Effects-3d effects-Inner Bevel with these settings.
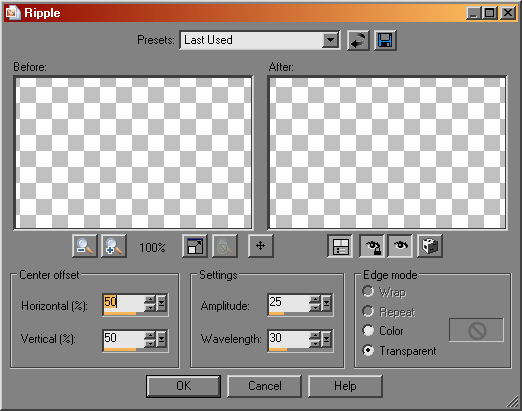
With the ants still marching, Effects-Distortion effects-Ripple with these settings.
With the ants still marching, Effects-3d effects-Drop Shadow, V and H at 1, Opacity 100, Blur 10 and color Black.
Selections-None.
Image-Add Borders, 5px symetrical, color black.
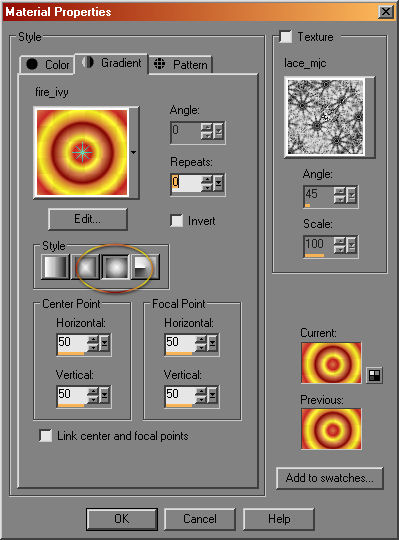
I used the font Harrington, size 60, and the gradient Fire_Ivy for the fill, the gradient set to the Sunburst as below.
Effects-3d-Drop Shadow, V and H at 2, Opacity 100, Blur 5, color black.
Adjust-Brightness/Contrast with Brightness at 20 and Contrast at 10.
Layers-Merge All.
Export as a JPG, save it to your desired folder, and name your tag.
You're done!!
I hope you enjoyed it :-)
I do not know the artist of this Beautiful graphic.