For this tutorial you will need a graphic.
No outside filters were used.
1. Open your choosen graphic in PSP. Shift+D to duplicate, then close the original.
Pick a light color from your graphic for the Foreground, and a darker color for your Background.
Resize your image so 350px is the "short side". For example, 350px wide and say 450px high, or 450px wide and 350px high.
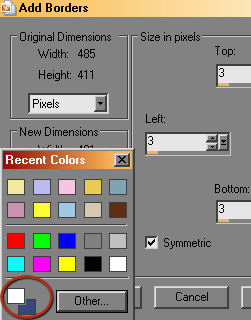
Images-Add Border. 3px Symetrical, with either your Foreground color or Background, depending on which would look better to you :-)
If you have a light graphic, your dark Background color may look better, or if your graphic is darker, the lighter Foreground color may be better.
A Hint to make these type borders easier.....
Once you have your Add Borders window open, right-click in the color box.
Down in the bottom left of the new window is your Foreground and Background colors, just click on which you want and Voila!!
Images-Add Border, 3px your second color.
Images-Add Border, 3px first color.
2. Images-Add Border, 30px second color.
With your magic wand, tolerance and feather at 0, click in the 30px frame.
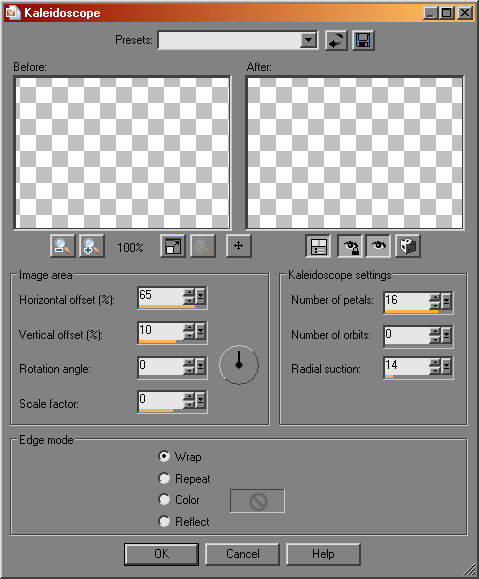
Effects-Image Effects-Kaleidoscope, starting with these settings.
You may want to change the Horizontal and or Vertical offset numbers to better suit your graphic.
Please feel free to change settings to suit you!!
While still selected, Effects-3d-Cutout, V&H at 0, Opacity 100 and Blur 15.
Select None
3. Image-Add Border, 3 px first color.
Image-Add Border, 3px second color.
Image-Add Border, 3px first color.
4. Selections-Select All.
Selections-Modify-Contract by 48px.
This should have your ants marching just inside all the framing you have added.
Selections-Invert.
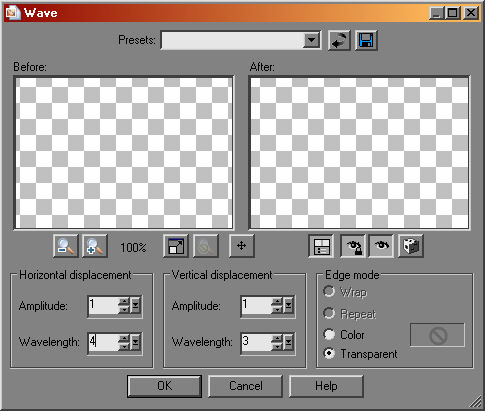
Effects-Distortion-Wave.
You may want to change the Wavelength in Horizontal and Vertical by a number or two.
Depending on whether your graphic is wider or taller, you will need to play just a bit here.
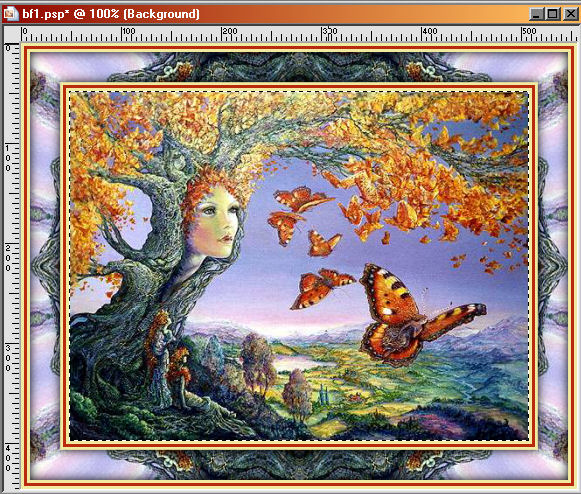
The settings I show here is what I used for the example at the top of the page.
While still selected, Effects-3d-Drop Shadow, V&H at 1, Opacity 100 and Blur 5.
Selections None.
Add text if desired and you're done!!